Use with Keras model
In this tutorial, we’ll convert ResNet50 [1] classification model pretrained in Keras [2] into WebDNN execution format.
1. Export Keras pretrained model
from keras.applications import resnet50
model = resnet50.ResNet50(include_top=True, weights='imagenet')
model.save("resnet50.h5")
2. Convert Keras model to our computation graph format
python bin/convert_keras.py resnet50.h5 --input_shape '(1,224,224,3)' --out output
At least you need to specify the model file and the shape of input array.
Also you can convert via python script
from webdnn.frontend.keras import KerasConverter
from webdnn.backend import generate_descriptor

graph = KerasConverter(batch_size=1).convert(model)
exec_info = generate_descriptor("webgpu", graph)  # also "webassembly", "webgl", "fallback" are available.
exec_info.save("./output")
Now you have the “graph descriptor” to execute on the web browsers in output directory.
3. Run on web browser
This document illustrates the essence of running the “graph descriptor” to execute on the web browsers. In convert_keras example directory, the complete codes for training and converting a Keras model and running it on the web browsers can be found.
First, You have to initialize [DescriptorRunner](../api_reference/descriptor_runner/interfaces/webdnn.dnndescriptorrunner.html) and load model data.
// ES6(modern JavaScript) version
let runner = await WebDNN.load('./output');

// traditional JavaScript version
WebDNN.load('./output')
   .then(function(runner){
       console.log('loaded');

       // add your code here.
   });
WebDNN automatically select the best backend based on Browser type and compiled model data on the server.
You can check the backend type
console.log(runner.backendName);

Then you can get input and output variable references (SymbolicFloat32Array type).
let x = runner.inputs[0];
let y = runner.outputs[0];
That’s all for initialization. You only have to do this at once in the application.
Let’s classify this image.
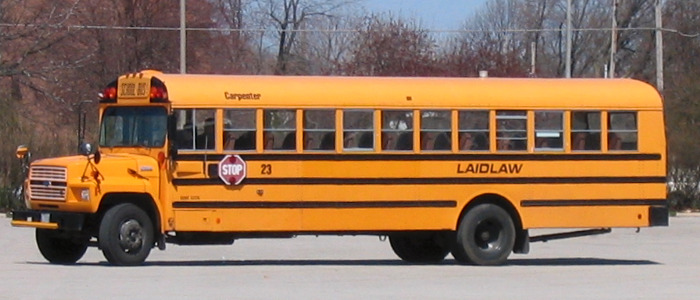
First, set input data. You can get image data as RGB format by using WebDNN.Image sub module
// ES6(modern JavaScript) version
x.set(await WebDNN.Image.getImageArray('/example/data/school_bus.jpg', { dstW: 224, dstH: 224 }));

// traditional JavaScript version
WebDNN.Image.getImageArray('/example/data/school_bus.jpg', { dstW: 224, dstH: 224 })
   .then(function(array) {
       x.set(array);
   });
Next, run model.
// ES6(modern JavaScript) version
await runner.run();

// traditional JavaScript version
runner.run()
   .then(function() {
       console.log('finished');
   });
That’s all.
Show computed vector and predicted label.
let y_typed_array = y.toActual();  // convert SymbolicFloat32Array into Float32Array
console.log('Computed vector', y_typed_array);
console.log('Predicted Label', WebDNN.Math.argmax(y_typed_array));
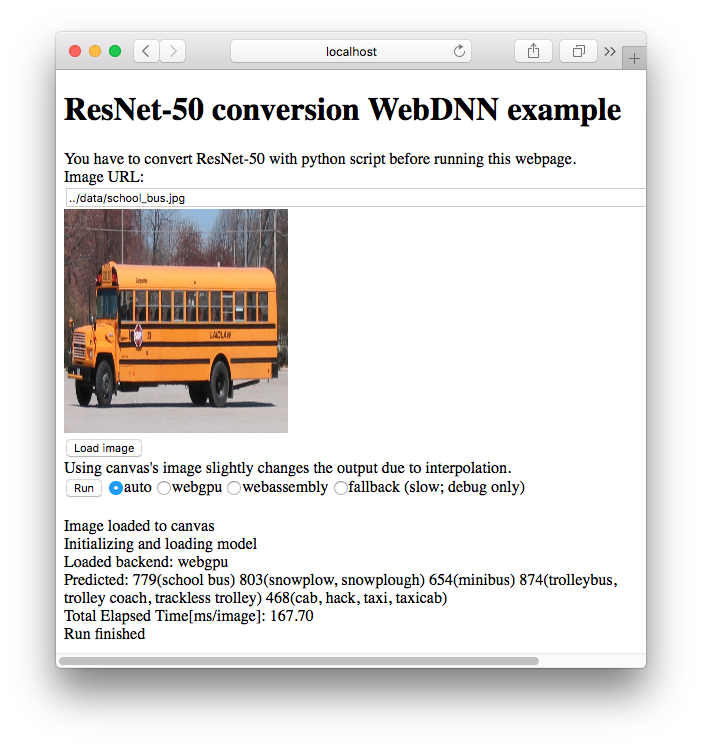
Congratulation! LabelID:779 is "School bus" in ImageNet. It looks work well.
References
| [1] |
|
| [2] | https://keras.io/applications/#resnet50 |